
DeepSeek_V4_API接入指南从申请到调用完整教程 - DeepSeek - 教程
本文手把手教你申请DeepSeek V4 API,包含完整代码示例、调用方法、常见问题。看完直接上手。
一、DeepSeek V4 API是什么?
DeepSeek V4 API是深度求索官方提供的编程接口,让你可以通过代码调用DeepSeek V4大模型的能力。
能干什么?
- 代码生成:自动生成Python、JavaScript等代码+ 文本生成:写文章、翻译、摘要+ 对话能力:构建AI助手、客服机器人+ 推理能力:数学计算、逻辑分析
为什么要用API?
- 比网页版更稳定+ 可以集成到自己的应用里+ 批量处理更高效
二、API申请步骤
Step 1:注册账号
- 访问 DeepSeek 开放平台:https://platform.deepseek.com+ 用手机号或邮箱注册+ 完成实名认证(需要身份证)
Step 2:创建API Key
- 登录后进入「API Keys」页面
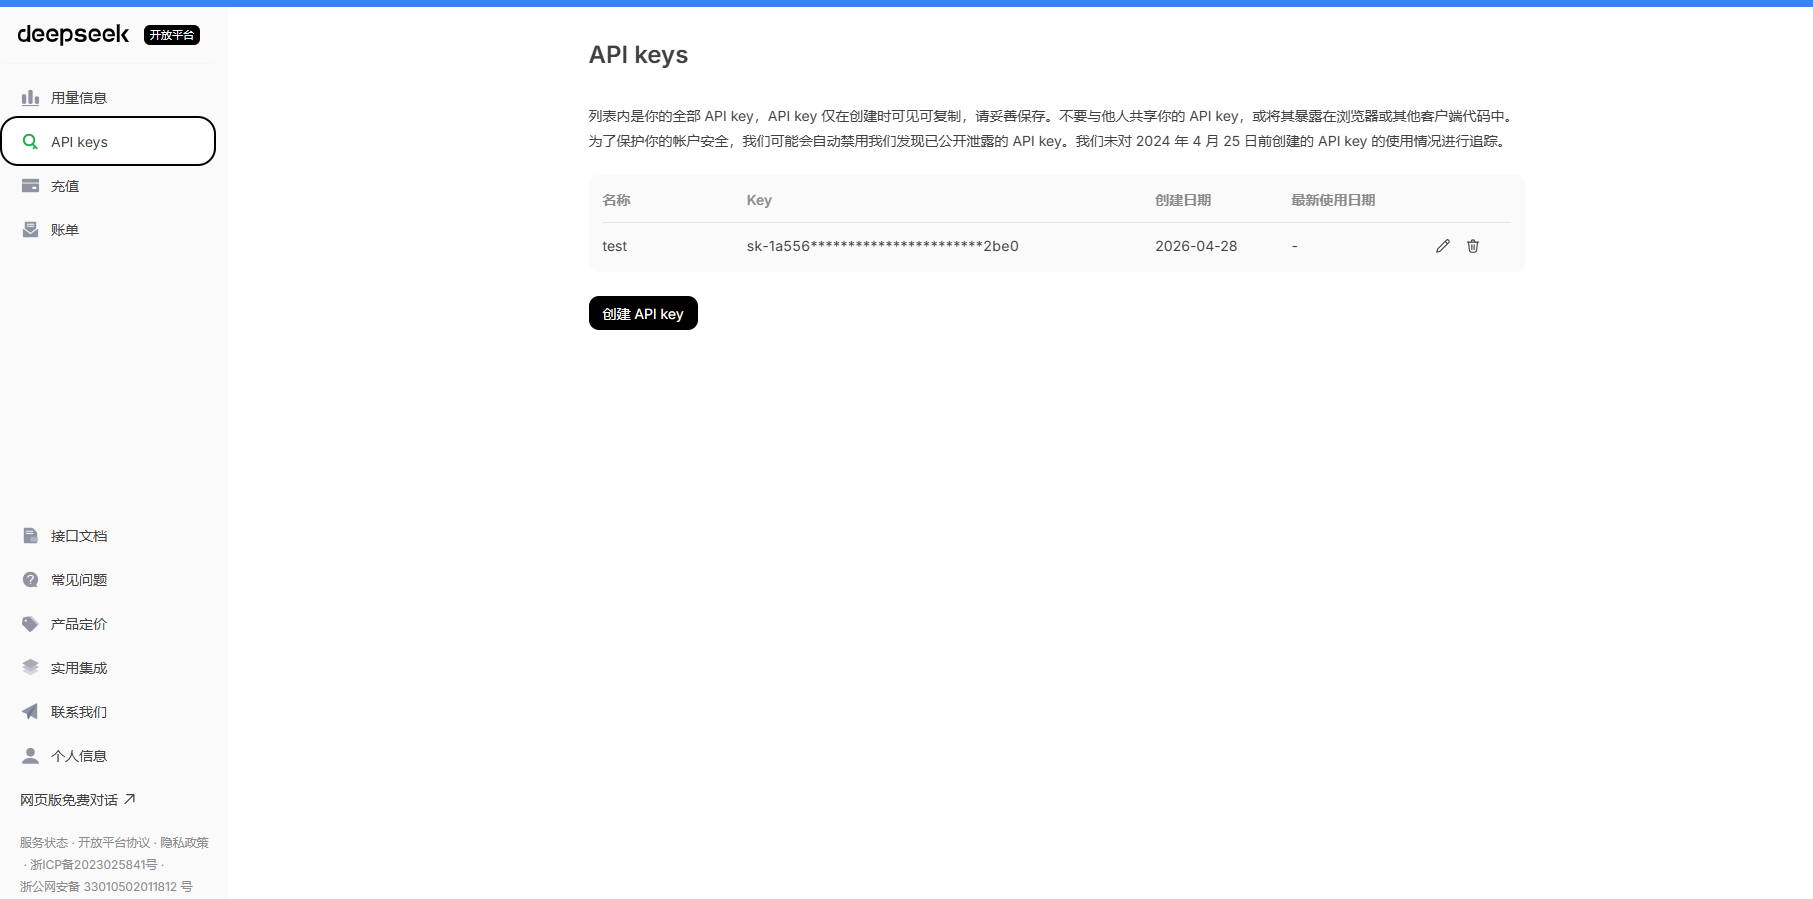 + 点击「创建API Key」
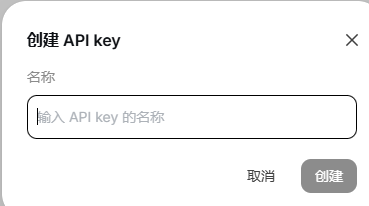 + 给Key起个名字(比如"个人项目")
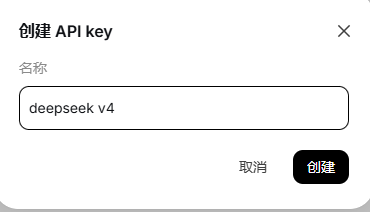 + **立即复制保存**,Key只显示一次

⚠️ 重要:API Key相当于密码,不要泄露,不要上传到GitHub
Step 3:查看额度
- 进入「账户余额」页面
 + 新用户有免费额度(通常10元) + 用完需要充值,价格约0.001-0.002元/千token
三、API调用代码示例
Python调用示例
import requests
import json
配置
API_KEY = “your-api-key-here” # 替换为你的API Key
API_URL = “https://api.deepseek.com/v1/chat/completions“
def chat_with_deepseek(prompt):
“””
调用DeepSeek V4 API进行对话
“””
headers = {
“Content-Type”: “application/json”,
“Authorization”: f”Bearer {API_KEY}”
}
data = {
    "model": "deepseek-chat",  # 使用V4模型
    "messages": [
        {"role": "system", "content": "你是一个 helpful 的AI助手"},
        {"role": "user", "content": prompt}
    ],
    "temperature": 0.7,  # 创造性程度,0-1之间
    "max_tokens": 2000   # 最大返回token数
}

try:
    response = requests.post(API_URL, headers=headers, json=data)
    response.raise_for_status()  # 检查HTTP错误

    result = response.json()
    return result['choices'][0]['message']['content']

except requests.exceptions.RequestException as e:
    return f"请求出错: {str(e)}"
测试:代码生成
if name == “main“:
prompt = “用Python写一个计算斐波那契数列的函数,要求使用动态规划优化”
print("=" * 50)
print("发送请求...")
print(f"Prompt: {prompt}")
print("=" * 50)

response = chat_with_deepseek(prompt)
print("\nDeepSeek V4 回复:")
print(response)
流式输出(实时显示)
import requests
import json
API_KEY = “your-api-key-here”
API_URL = “https://api.deepseek.com/v1/chat/completions“
def chat_stream(prompt):
“””
流式调用,实时显示结果
“””
headers = {
“Content-Type”: “application/json”,
“Authorization”: f”Bearer {API_KEY}”
}
data = {
    "model": "deepseek-chat",
    "messages": [
        {"role": "user", "content": prompt}
    ],
    "stream": True,  # 开启流式输出
    "temperature": 0.7
}

response = requests.post(API_URL, headers=headers, json=data, stream=True)

print("AI: ", end="", flush=True)
for line in response.iter_lines():
    if line:
        line = line.decode('utf-8')
        if line.startswith('data: '):
            json_str = line[6:]  # 去掉 "data: " 前缀
            if json_str == '[DONE]':
                break
            try:
                chunk = json.loads(json_str)
                content = chunk['choices'][0]['delta'].get('content', '')
                print(content, end="", flush=True)
            except:
                pass
print()
测试流式输出
if name == “main“:
chat_stream(“写一首关于编程的诗”)
带上下文的对话
import requests
API_KEY = “your-api-key-here”
API_URL = “https://api.deepseek.com/v1/chat/completions“
class DeepSeekChat:
def init(self):
self.messages = [] # 保存对话历史
def chat(self, user_input):
    # 添加用户消息
    self.messages.append({"role": "user", "content": user_input})

    headers = {
        "Content-Type": "application/json",
        "Authorization": f"Bearer {API_KEY}"
    }

    data = {
        "model": "deepseek-chat",
        "messages": self.messages,
        "temperature": 0.7
    }

    response = requests.post(API_URL, headers=headers, json=data)
    result = response.json()

    # 获取AI回复
    ai_reply = result['choices'][0]['message']['content']

    # 添加AI回复到历史
    self.messages.append({"role": "assistant", "content": ai_reply})

    return ai_reply

def clear_history(self):
    """清空对话历史"""
    self.messages = []
使用示例
if name == “main“:
chat = DeepSeekChat()
# 第一轮对话
print("用户: Python是什么?")
print(f"AI: {chat.chat('Python是什么?')}")

# 第二轮(带上下文)
print("\n用户: 它有什么优点?")
print(f"AI: {chat.chat('它有什么优点?')}")  # AI知道"它"指Python

# 第三轮(继续上下文)
print("\n用户: 写一个Hello World")
print(f"AI: {chat.chat('写一个Hello World')}")
四、API参数详解
参数类型说明示例modelstring模型名称“deepseek-chat”messagesarray对话消息列表[{“role”: “user”, “content”: “你好”}]temperaturefloat创造性,0-2,越大越随机0.7max_tokensinteger最大返回token数2000streamboolean是否流式输出falsetop_pfloat核采样,0-11.0
role类型:
+
system```
:系统提示,设定AI角色+ `user`:用户输入+ `assistant`:AI回复


#### 五、常见错误及解决


##### ❌ 错误1:401 Unauthorized

{"error": "Invalid API Key"}


**原因**:API Key错误或过期 **解决**:检查Key是否正确,重新创建

##### ❌ 错误2:429 Too Many Requests

{"error": "Rate limit exceeded"}


**原因**:请求太频繁 **解决**:降低调用频率,或升级账户

##### ❌ 错误3:Insufficient Balance

{"error": "Insufficient balance"}


**原因**:余额不足 **解决**:充值账户

##### ❌ 错误4:Timeout


**原因**:网络问题或请求太大 **解决**:检查网络,减小max_tokens


#### 六、不想写代码?一键接入方案


如果你不想折腾API申请、写代码、处理报错,可以试试 **EasyClaw**。
<img src="https://i-blog.csdnimg.cn/direct/20318ed32dec464bb4da40037adcedc2.png" referrerpolicy="no-referrer" alt="image">


**EasyClaw已经内置DeepSeek V4 API**,开箱即用:
<img src="https://i-blog.csdnimg.cn/direct/c43e1380859440e6a65d1d0463c9a3ee.png" referrerpolicy="no-referrer" alt="image">


✅ **免API配置** - 不用申请Key,不用充值 ✅ **免写代码** - 界面直接对话,代码一键复制 ✅ **免环境配置** - 下载安装就能用 ✅ **支持多平台** - 可连接飞书,团队协作

**适合谁:**

+ 想快速体验DeepSeek V4,不想折腾API的开发者+ 非技术人员,不会写代码+ 需要团队协作,共享AI助手


**对比传统API接入:**
方式申请Key写代码配置环境充值适合人群官方API✅ 需要✅ 需要✅ 需要✅ 需要技术开发者EasyClaw❌ 不需要❌ 不需要❌ 不需要❌ 不需要所有人

**下载地址:** [EasyClaw | 已接入DeepSeek v4 下载即用](https://link.csdn.net/?target=https%3A%2F%2Feasyclaw.cn%2F%3Ff%3D327%26login%3Dfrom_csdn)


#### 七、总结


**本文解决了什么问题:**

+ DeepSeek V4 API怎么申请?→ 注册→认证→创建Key+ 怎么调用?→ Python代码示例,复制即用+ 常见问题?→ 4个典型错误及解决方案+ 不想折腾怎么办?→ EasyClaw免配置直接使用


**如果你需要批量调用、集成到项目里**,建议用官方API。 **如果你只想快速体验、不想折腾配置**,直接下载EasyClaw。

**下载地址:** [EasyClaw | 已接入DeepSeek v4 下载即用](https://link.csdn.net/?target=https%3A%2F%2Feasyclaw.cn%2F%3Ff%3D327%26login%3Dfrom_csdn)